Showing posts with label creative giving. Show all posts

Wednesday, November 30, 2011

Creative Giving Class - FORT KITS!

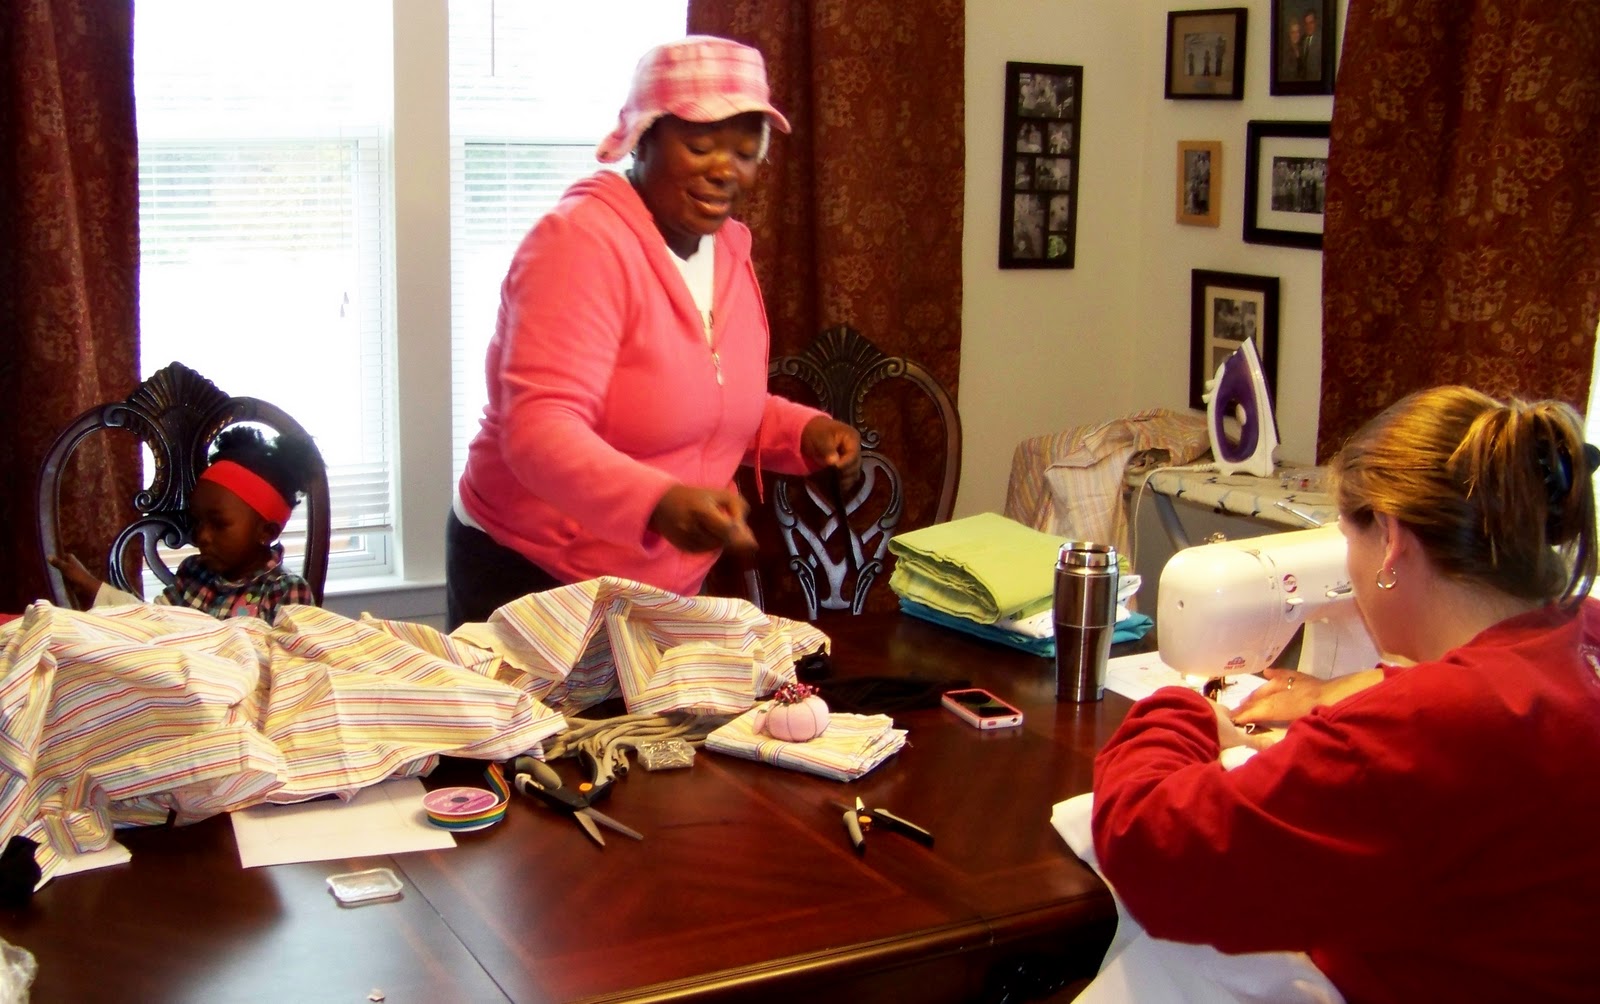
We had a lovely, laughter-filled morning of fort-kit-making!  Really, we didn't make the kits, we just prepared the sheets for kits.  Basically, you sew loops on the corners, side, and middle of each sheet.  Then  you add some clothespins or clips to it to make fort-making a bit easier for the kiddos.  I only picked up my camera one time.. here Erica is getting ready to pin some loops on sheets, while Aimee sews along...
The original tutorial (link below) suggested using t-shirt strips for the loops because the material is stretchy and doesn't fray.  Aimee had the genius idea of alternating ribbon with the t-shirt loops.  This way the kids can tie their fort onto something if necessary.  Also, if you notice, Aimee used white sheets for her kit and she is going to include fabric markers so the recipients can decorate their fort.  Isn't that clever? 
And I had to snag this picture off of facebook... Tami got three kits ready for gifting while she was in class (but I didn't catch her in the pictures above).  She obviously ended up giving her kiddos a kit yesterday :)  There were MANY pictures of her family playing with this kit in the afternoon.  So adorable! 
Here is the link to the kits: click here!

And as you know, the Creative Giving classes are free; but I do accept donations to go towards the sewing machine fund for AMG International - Guatemala.  Its awesome to get together, have fun, teach a skill AND make a difference all at once.  The sewing machines will provide an opportunity for parents to learn a skill that can potentially provide additional income for their family... that is HUGE!  And I am happy to announce that we're up to $338.77 toward the sewing machine fund!  Woo Hoo!  Praising God for the generosity of those participating in the Creative Giving Classes!

Wednesday, November 16, 2011

Creative Giving - Fabric Flower Headbands!

I confess, I forgot to get the camera out during "class."  So I had to take a few pictures of myself after the fact.  I didn't feel like a dork at all ;)

Ok, these babies are easy... and versatile.  This one even looks totally different depending on which way I wear it...
see... totally different.  Huh?
And a little closer shot.  I chose three flowers of varying sizes using two fabrics.  I used a super-skinny-headband because headbands tend to give me a headache, so I thought the skinnier version might not be as bad. 
Once you get the hang of making your fabric flowers, you can attach them to anything... alligator clips, barrettes, pins, elastic headband, purse straps, t-shirts, flip-flops, key chains... the list could go on and on... ;)

Here a couple links with different variations of how-to make these babies.

This link from Prudent Baby has an excellent step-by-step tutorial for the rolled flowers.  It doesn't really explain how to attach the flowers to the headband though.  But this is the way that I learned to make the rolled fabric flowers, so I wanted to be sure to pass it along.  Prudent Baby has tons of great stuff so you might want to take a peek around while you are there. ;)

This link from lil blue boo also has great step-by-step tips for making rolled fabric flowers using pipe cleaners (or chenille stems if you want to be politically correct).  I've never made them this way, but it seems like it might almost be easier... This tutorial also goes into detail about adding the flowers to your headband so be sure to check it out if you aren't sure about that part.  You'll find a wealth of other ideas at lil blue boo too, so browse for more ideas while you are there!

Now just a few tips from me. 
  • First off, I think Fabri-tac is the best glue for this.  You could use your hot glue gun or another type of Tacky Glue, but my fav is by far Fabri-tac.  
  • And secondly, give yourself a break and just have fun.  Your very first flower might not be perfect.  I aim for one side being rather gummed-up and gluey, and one side to be "clean."  Sometimes my clean side has a little glue on it...  I'm pretty sure no one will notice it on your finished flower.  So don't stress. 
  • Finally, a word about the fray.  I don't mind the frayed edges of the fabric showing.  I actually rip my fabric strips (instead of cutting them).  If you aren't a fan of the fray, then pay close attention as you are twisting & gluing and tuck that fray under.  Remember, nobody is going to see the bottom so it can be a big crazy mess under there. ;)
Have fun!  As always, I'd be happy to help you through if you decide to try this and get stuck.  These are FUN and SIMPLE, really, they are!!!  And not too expensive either.  You CAN do it!    I'm sure the bloggers I linked to could also be of great help... if you need it!


As for the sewing machine fund... we are up to $288.86!!!  Woo-hoo!  Thanks for the donations and custom orders ;)  I'm going to send in the grand total after the last Creative Giving class in December.  So I will keep you posted!


Wednesday, October 26, 2011

Creative Giving Class #3

Oh my did we have fun! Well, I certainly had fun! Today's class was crayon rolls or a modified version for cars.  I'll add a few links at the end for places to look for tutorials.  I've made so many crayon rolls with my own variations that I didn't use a tutorial today.  And then we modified it to make it work for some Cars from the movie Cars (which tend to be a little bit bigger than matchbox cars - and still poor Mater had no where to park his big tow truck self!)


We go to work cutting out the pieces, and decided we had time to go ahead and make two car rolls - because Stephanie has two boys it only made sense!
Miss Maria over there in the sunlight brought a project that she has been meaning to finish, so she got to work on that while we worked on the rolls.  Stephanie sat down behind that machine and it was like she'd been sewing all along!  Great fun!
I did forget to take a picture of the final product... but if you look really carefully in that picture right above this, you'll see one of the car rolls laying on the table in the bottom right side.

And for some AWESOME news... we are up to $202 towards the sewing machine fund.  I nearly got all teary-eyed when we counted the money this afternoon!  Praising God for His goodness.  We had a sweet time together; and to top it off I got to hear an wonderful adoption story.  God sure knows how to send me the sweetest encouragement at just the right moment!

Tutorials to check out for crayon rolls...

THIS is the first tutorial I ever tried, but the ric rac almost made me lose my mind, so I never use the ric rac. It's a very well written tutorial by Skip To My Lou.
THIS has a button & elastic closure instead of ribbon ties. You'll find lots of other things to explore at The Pleated Poppy.
...also if you google "crayon roll tutorial,"  you'll be sure to find one you want to try!  I always make my crayon rolls hold 8 crayons.  The first ones I made were for the boys while Daddy was deployed, and I made them to keep in my purse for going places... the last thing I wanted to do was track down 36 crayons to put back in the rolls when we were leaving.  So you can basically pick any number of spaces you want and adjust your pattern to make it work for you.

I couldn't find a basic car roll tutorial that was as simple as the one we made.  We basically made an 8-pocket crayon roll into a 4-pocket car roll, and added 1/2 an inch to each pocket (2 inches overall).  But here is a link to a fancy-dancy car roll that I've made in the past, I know the tutorial is well written! homemade by jill is a lovely blog with lots of other goodies to explore!

Remember, if you decide to try one of these on your own you can always ask me questions about it if you get stuck!  Or, you can ask the blogger that wrote the lovely tutorials too. 

The next class is a no-sew one!  Should be a great time!

Wednesday, October 12, 2011

Creative Giving Class #2

We had our 2nd class today, and it was SO fun!  We made basic pillowcase dresses (with some modifications.)  The very first pillowcase dress that I made was from an actual pillowcase.  I used this tutorial - click here.  If you google "pillowcase dress tutorial" you'll find a TON of them!  I've since branched out and tweaked a number of tutorials to make them work for me.  If you want to try to make a pillowcase dress yourself, start simple!  You can do it!  If you try one out and get stuck just send me an email and we'll get it figured out!

We did some tweaks today in our dress-making class but it all worked out!  Look how adorable the little lady is that gets to wear the dress! 
I transform the kitchen/dining area into sewing central for Creative Giving days.  Here we are cutting out the fabric to length.  Since we decided to use fabric, we first had to sew it together like a pillowcase (sides & hem) before we could get to the dress-making part...
Sewing is serious business.
Very serious!
Sonya did an awesome job!  We realized today that all three of us (Erica was the photographer for most of this class!) have an old machine from our mothers.  Isn't that cool?  Thanks Moms!
And, drum roll please... the finished dress!  Isn't it adorable. And unique!


You might have noticed the jar for donations up there in one of those pictures.  So I thought I'd give you a goal update.  We're up to $53 towards the sewing machine fund for Guatemala.  We were talking about the goal today and I realized that maybe I'm not talking enough about that part - which is really the most important part.  These sewing machines and subsequent classes for the families in Guatemala can potentially be life changing.  Sewing there wouldn't just be a fun experiment.  It could be another form of income for a family that is stretched thin.  The poverty there is not like poverty here.  Having an additional means of income could help families be more secure in being able to provide for their children.  I'm so honored to be participating with AMG International in this little way.  I know it will make a big difference.  I'm thanking God for this privilege. 

Wednesday, September 28, 2011

Apron in an hour!

 We did it!  We had our first Creative Giving class yesterday!  And it turned out to be a lot of fun.   We had 100% attendance of the ladies that RSVP'd to come.  So, I was pretty thrilled with that statistic.  There were three of us... plus three sewing machines without manuals and two very adorable toddler-baby-girls.  Thankfully we were able to get two out of three of those machines working (we determined that the third one was missing a part).  We used this tutorial...(click here to go to the tutorial).  I had used it before to make aprons as gifts and thought it was very well written.  I promise if you try to make one this tutorial will not lead you astray!  Jona the tutorial's author has even converted it to a pdf file that you can print off easily from the post on her blog.  If you get a few minutes you should peek around Jona's blog, "Stop Staring and Start Sewing!   Because its fun!"  She's extremely talented and very generous with tips and ideas!
 Erica kept encouraging me to take pictures, but I never went upstairs to get the camera... so these iPhone photos will have to do.  We were done by the time the photoshoot started and I was a bit giddy with joy by then!  Erica was quite pleased with the end result... and an excellent student too!  I must admit, the teacher in me had such fun when the AHA! moments came along!  There was one point when Erica was quite puzzled about a step and I told her just to trust me that it was going to work... and as you can see... it sure did!
Unfortunately I didn't get any pictures before our other guest  had to leave...  but hopefully she'll be back for the next class... pillowcase dresses!

Let me know if you try out the tutorial.  If you have any questions feel free to ask in the comments or email me!

I repeated a number of times yesterday "as long as you can thread your machine and you have a seam-ripper handy, you'll do just fine."  Its true!  Happy sewing! 

Tuesday, September 20, 2011

Creative Giving classes

As you know, my goal is to purchase a sewing machine (or two!) for AMG International Guatemala so they can start a sewing program in one of their projects.  A sewing program could bring life-changing opportunities for families there.  Pretty exciting, huh?  As you might remember, I was originally going to teach some friends how to make pillowcase dresses and send them down there... but God directed us to raising funds instead (you can read the longer version of that story here.)  25% of everything that I make and sell will go toward the sewing machine fund.  But God has also laid it on my heart to offer some classes to friends anyway.  And instead of collecting what we make, I'm going to be accepting donations toward the sewing machine fund.

With Christmas coming, I thought it would be fitting to do some classes centered around gift ideas this fall.  There is a lot of pressure here in America to buy many, many gifts!  And I know it can be overwhelming.  My hope is that some of the gift-giving tension is alleviated by learning how to make some simple gifts. I pray that each class will be a blessing that continues to multiply.  My hope is that we come together and enjoy learning together, that we can collect some money to send to AMG International Guatemala, and that each family has a more peace-filled Christmas season.  I think this video from Advent Conspiracy communicates some of what my heart is thinking that my mind can't quite put into words...


 See, a little bit can make a big difference in the long run.  I hope you can join us for a Creative Giving class this fall!!

Classes will be stand alone - meaning each class will be a new subject.  You can come to one class or every class - hand-pick which ones fit with your schedule and your needs!  Each class will be outlined on a FB event and also here on the blog.   Classes will be the 2nd and 4th Tuesday of the month.  Depending on the number of ladies that RSVP the classes will be at my house or a clubhouse on post.  I will not publish my address on the blog or FB, but I will happily send it to you via private message once I determine that you are not a creepy-freak.  Classes will begin at 9 am and end by 12 pm - you are free to come when you can and leave when you must.  If you do not finish a project during class that's perfectly fine.  If you need help finishing it up we can make a plan to do so.  Donations will be collected in a jar during class.  You can give whatever you feel is appropriate.  We will spend some time praying for AMG International Guatemala at each class as well.

What about those of you that are far off?  I'm going to post the tutorials or links to tutorials here on the blog on Wednesdays following class... that way if we hit any snags, I can let you know.  I'm working on adding a "donate" button to the blog so you can do paypal donations right here, if you want!  Also, if you are far-off and you want to host your own class let me know, I'd love to pray for your group.

Ok, the first class is next Tuesday!  We are making an "Apron in an Hour".  You will need:
  • a sewing machine
  • thread
  • 1 fat quarter*
  • 1/2 yard of a coordinating fabric 
*what the heck is a fat quarter? Its a quarter of a yard, but cut in a square instead of a long rectangle. Normally when you pick up a fabric and take it to the counter for cutting, they roll it out and measure 1/4 of yard - which is 9 inches, they would then cut this width the length of the fabric. Which yields a long, skinny piece of fabric. They now pre-package fat quarters, which is a corner of one whole yard. So its more of a square and its not as long. If you go to Jo-Ann's and ask, I promise you they won't even think you are asking something weird!
I'm very excited to begin the classes next week!