Showing posts with label goal. Show all posts

Wednesday, November 30, 2011

Creative Giving Class - FORT KITS!

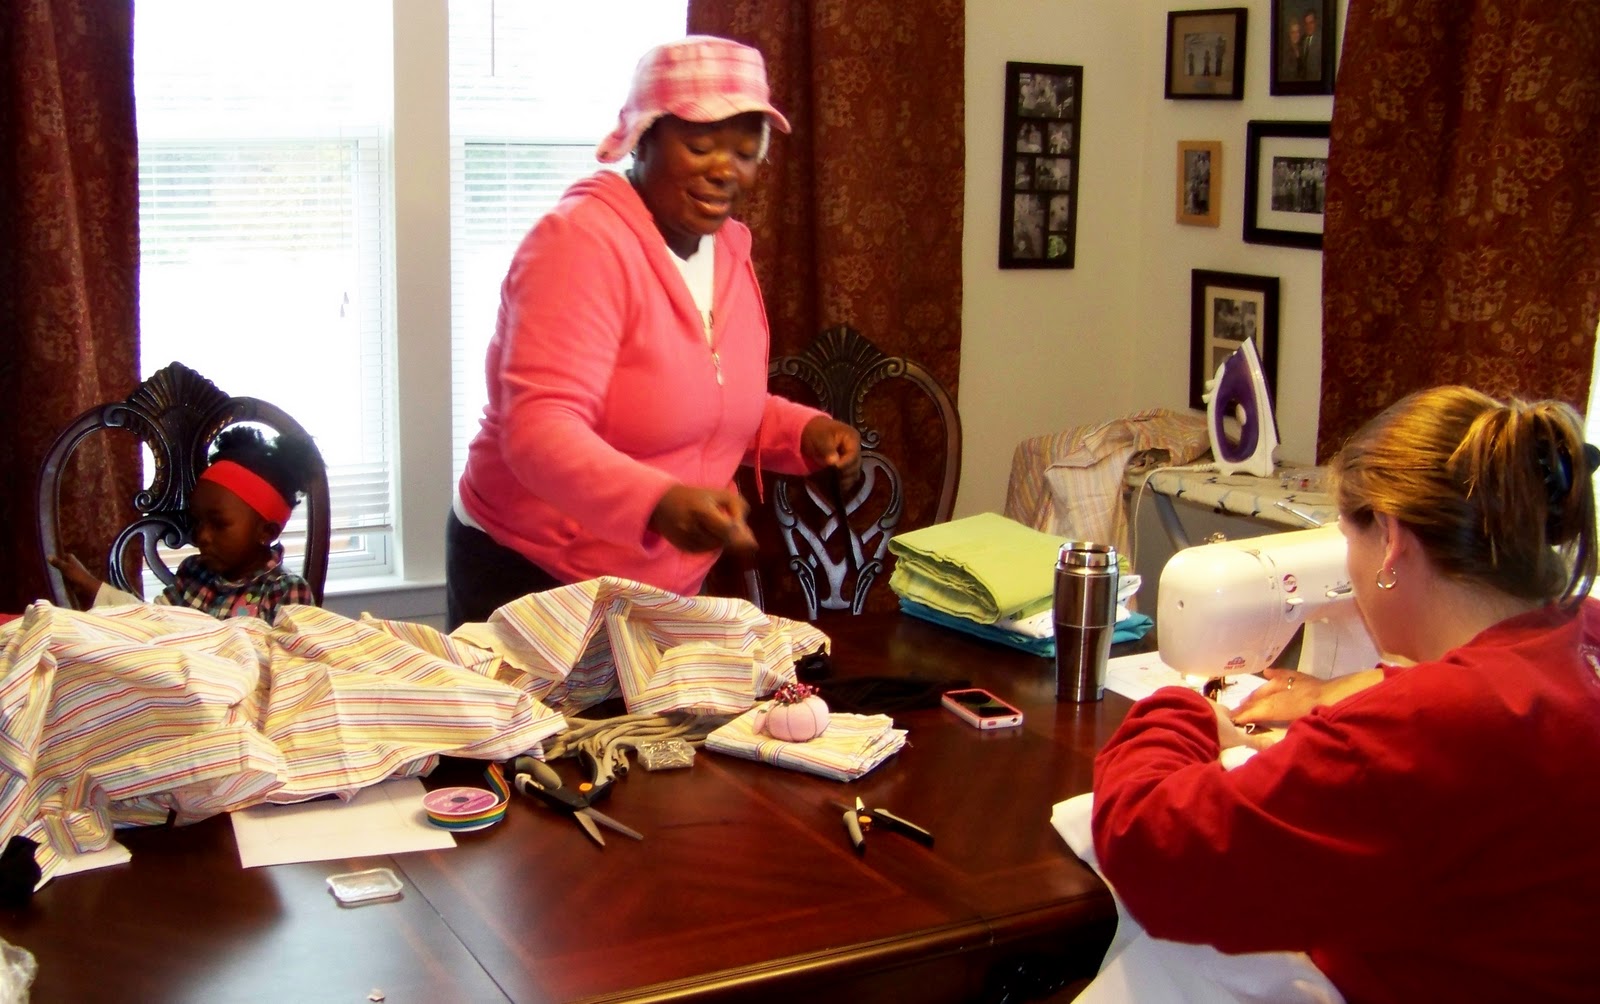
We had a lovely, laughter-filled morning of fort-kit-making!  Really, we didn't make the kits, we just prepared the sheets for kits.  Basically, you sew loops on the corners, side, and middle of each sheet.  Then  you add some clothespins or clips to it to make fort-making a bit easier for the kiddos.  I only picked up my camera one time.. here Erica is getting ready to pin some loops on sheets, while Aimee sews along...
The original tutorial (link below) suggested using t-shirt strips for the loops because the material is stretchy and doesn't fray.  Aimee had the genius idea of alternating ribbon with the t-shirt loops.  This way the kids can tie their fort onto something if necessary.  Also, if you notice, Aimee used white sheets for her kit and she is going to include fabric markers so the recipients can decorate their fort.  Isn't that clever? 
And I had to snag this picture off of facebook... Tami got three kits ready for gifting while she was in class (but I didn't catch her in the pictures above).  She obviously ended up giving her kiddos a kit yesterday :)  There were MANY pictures of her family playing with this kit in the afternoon.  So adorable! 
Here is the link to the kits: click here!

And as you know, the Creative Giving classes are free; but I do accept donations to go towards the sewing machine fund for AMG International - Guatemala.  Its awesome to get together, have fun, teach a skill AND make a difference all at once.  The sewing machines will provide an opportunity for parents to learn a skill that can potentially provide additional income for their family... that is HUGE!  And I am happy to announce that we're up to $338.77 toward the sewing machine fund!  Woo Hoo!  Praising God for the generosity of those participating in the Creative Giving Classes!

Wednesday, November 16, 2011

Creative Giving - Fabric Flower Headbands!

I confess, I forgot to get the camera out during "class."  So I had to take a few pictures of myself after the fact.  I didn't feel like a dork at all ;)

Ok, these babies are easy... and versatile.  This one even looks totally different depending on which way I wear it...
see... totally different.  Huh?
And a little closer shot.  I chose three flowers of varying sizes using two fabrics.  I used a super-skinny-headband because headbands tend to give me a headache, so I thought the skinnier version might not be as bad. 
Once you get the hang of making your fabric flowers, you can attach them to anything... alligator clips, barrettes, pins, elastic headband, purse straps, t-shirts, flip-flops, key chains... the list could go on and on... ;)

Here a couple links with different variations of how-to make these babies.

This link from Prudent Baby has an excellent step-by-step tutorial for the rolled flowers.  It doesn't really explain how to attach the flowers to the headband though.  But this is the way that I learned to make the rolled fabric flowers, so I wanted to be sure to pass it along.  Prudent Baby has tons of great stuff so you might want to take a peek around while you are there. ;)

This link from lil blue boo also has great step-by-step tips for making rolled fabric flowers using pipe cleaners (or chenille stems if you want to be politically correct).  I've never made them this way, but it seems like it might almost be easier... This tutorial also goes into detail about adding the flowers to your headband so be sure to check it out if you aren't sure about that part.  You'll find a wealth of other ideas at lil blue boo too, so browse for more ideas while you are there!

Now just a few tips from me. 
  • First off, I think Fabri-tac is the best glue for this.  You could use your hot glue gun or another type of Tacky Glue, but my fav is by far Fabri-tac.  
  • And secondly, give yourself a break and just have fun.  Your very first flower might not be perfect.  I aim for one side being rather gummed-up and gluey, and one side to be "clean."  Sometimes my clean side has a little glue on it...  I'm pretty sure no one will notice it on your finished flower.  So don't stress. 
  • Finally, a word about the fray.  I don't mind the frayed edges of the fabric showing.  I actually rip my fabric strips (instead of cutting them).  If you aren't a fan of the fray, then pay close attention as you are twisting & gluing and tuck that fray under.  Remember, nobody is going to see the bottom so it can be a big crazy mess under there. ;)
Have fun!  As always, I'd be happy to help you through if you decide to try this and get stuck.  These are FUN and SIMPLE, really, they are!!!  And not too expensive either.  You CAN do it!    I'm sure the bloggers I linked to could also be of great help... if you need it!


As for the sewing machine fund... we are up to $288.86!!!  Woo-hoo!  Thanks for the donations and custom orders ;)  I'm going to send in the grand total after the last Creative Giving class in December.  So I will keep you posted!


Friday, October 14, 2011

little bits

So much to say, but even more to do!!!  God is blessing and challenging my heart so much in this endeavor.  I really want to sit and tell you every detail, but I don't think this minute, today, is the time to do it.  But I promise, when the time comes, I'll tell you more about it all. One thing I can share with you  -- every time I tell someone about the sewing machine fund I get chills... and I'm not certain but I think they do to. I just think that's a fun fact.

I made a couple "sibling sets" for Bit of Benning, I took pics of each set and put them on FB too.  Can I tell you how weird it was when I first typed the words "sibling set?"  Because we are in the process of adopting from foster care and have had to state our family preferences, and we've said yes to a "sibling set."  And as I was describing these outfits it just seemed weird to describe clothing using the same terms as children.  I concluded that it was probably only awkward for me to read.  Right?  But since I brought it up, how about taking a minute to pray for kiddos in foster care and families to adopt them?  And especially those sibling sets out there ;)

Also, I updated my ACU wreath with some fall colors.  What do you think?

welcome fall.  You aren't quite the same here in Georgia as you are in Michigan, but I still love you.
I have three custom orders to get cracking on.  And two involve things I've never made before!  EEK!  And I'm excited about it.  When I did the strength-finders test it revealed that I'm a "learner."  The fact that  I get excited to make new things, kinda supports that idea.  All of this is connected with the stuff God is teaching me right now.  I love that He is such an excellent teacher, using all manner of circumstances to drive home a point.  More to come on that...

Wednesday, October 12, 2011

Creative Giving Class #2

We had our 2nd class today, and it was SO fun!  We made basic pillowcase dresses (with some modifications.)  The very first pillowcase dress that I made was from an actual pillowcase.  I used this tutorial - click here.  If you google "pillowcase dress tutorial" you'll find a TON of them!  I've since branched out and tweaked a number of tutorials to make them work for me.  If you want to try to make a pillowcase dress yourself, start simple!  You can do it!  If you try one out and get stuck just send me an email and we'll get it figured out!

We did some tweaks today in our dress-making class but it all worked out!  Look how adorable the little lady is that gets to wear the dress! 
I transform the kitchen/dining area into sewing central for Creative Giving days.  Here we are cutting out the fabric to length.  Since we decided to use fabric, we first had to sew it together like a pillowcase (sides & hem) before we could get to the dress-making part...
Sewing is serious business.
Very serious!
Sonya did an awesome job!  We realized today that all three of us (Erica was the photographer for most of this class!) have an old machine from our mothers.  Isn't that cool?  Thanks Moms!
And, drum roll please... the finished dress!  Isn't it adorable. And unique!


You might have noticed the jar for donations up there in one of those pictures.  So I thought I'd give you a goal update.  We're up to $53 towards the sewing machine fund for Guatemala.  We were talking about the goal today and I realized that maybe I'm not talking enough about that part - which is really the most important part.  These sewing machines and subsequent classes for the families in Guatemala can potentially be life changing.  Sewing there wouldn't just be a fun experiment.  It could be another form of income for a family that is stretched thin.  The poverty there is not like poverty here.  Having an additional means of income could help families be more secure in being able to provide for their children.  I'm so honored to be participating with AMG International in this little way.  I know it will make a big difference.  I'm thanking God for this privilege. 

Tuesday, September 13, 2011

what's the point?

So what's the point in doing all this anyway?

I believe God has gifted me with a creative streak.  I love creating things.  He made me this way.  It's taken me awhile to realize that it's for a purpose.  I used to think it was just for fun... but now I realize that my fun can bring Him glory!  Man, He's awesome!

This year I have promised my son a portion of all of my sewing sales (for his goal). I have decided to donate an additional 25% of all of my sales to AMG International Guatemala, specifically for a sewing machine for one of their projects.  One of my friends from college is a missionary there with her family.  She jokingly suggested that I send her some of my pillowcase dresses when I posted a picture on Facebook.

I jumped on her joke and asked if I really could send some dresses.  I knew at least a couple people here that would want to learn how to make them and I thought we could just sew a bunch and ship them off.  Easy-peasy!

But God's plan was different.  Isn't it always?

"Commit your works to the Lord and your plans will be established."  Proverbs 16:3

After exchanging a few emails we determined that the dresses were not really practical for the needs there.  Then there was also the issue of what to send for boys, and then there was the issue of shipping... and all the time and energy that goes with passing along a package for this person to pack to take on their next trip to get to the right person... So we exchanged some more emails to try and discern what would do the most good and bring God the most glory.

After praying extensively about it, I decided I would start selling more broadly (instead of just at the gift shop on post) and offer a few crafting classes with proceeds going towards a sewing machine.


And I just gotta share this message I got back from my friend... this is the part where God let us know He had this all planned out.  She forwarded me a portion of an email from the director of education there...

"This news is an answer from the Lord, we have indeed a daycare center in Villa Laura where the mothers have showed interest in learn sewing and the director is really interested in teaching that as part of school for parents. So, he has been asking and praying for the provision of a couple of sewing machines, the prices of simple ones (the right ones to teach) are between $200.00 and $250.00. If your friend can help with one of these, we can try to find funds for the other, and then the day care center can start with the teaching."

So that's the goal.  To provide a sewing machine (or two maybe?) for this center...

...which will help these children's parents gain a skill that can potentially help provide more for their families! How thrilling to get to be a part of God's work, using the talents He has given me to produce a harvest for His kingdom!


Here's a direct link to the AMG International Guatemala blog if you want to find out more about their program.  Click HERE.


And here's a link to my friend Marlana's family ministry blog.